Happy Valentine’s day!!
Well, my meeting was cancelled, so I am at home and wondering why school was not cancelled too….around here it is bad with really dangerous driving conditions. I am happy to be sitting by the fire and taking the opportunity to continue the sketch-up models of the project.
We left off yesterday with the first set of snap ties in place with the interior ribbon boards and corner stud in place so as to be certain we have set up the corner correctly.
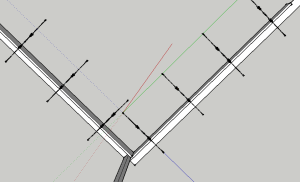
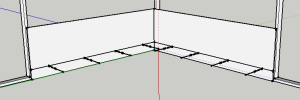
The next step is # 8 – placing the rest of the ties in position. To do this, we’ll remove the interior ribbon board and stud, and using the corner ties as reference, we’ll measure the spacing for the rest of the ties…..remember that they cannot be more than 24″ apart. Ideally, they should be placed so that the distances between them are similar.
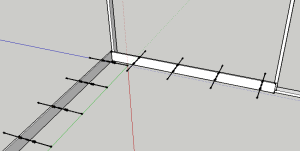
Step 9: first end stud:
I like to put up this stud before the plywood panel as it gives me a place to attach the panel. Use two 2 inch common nails to attach this stud so that it will stay where you have placed it.
A couple of things about nails: you should be using ONLY 2″ and 3-1/2″ nails for this project – no other type of nail is correct, and no screws or other attachments. Also, do not use a 3-1/2″ nail where the appropriate nail is a 2″! Or vice-versa!! Never toe-nail the studs, please. and nails should be driven in straight and completely. Bent nails will result in loss of marks.
Step 10: 1st plywood
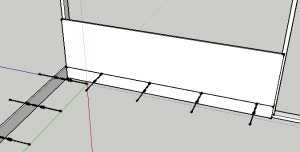
You need to place this panel correctly as it will create the pattern for the rest of this wall. Take care to overhang the edge of the panel over the corner stud a fingernail’s thickness (on the left of the model) so that the connection between the walls will be clean and tight. You should also notice that the panel is nailed to the centre of the stud on the right. The reason is that we may want to continue this wall as all these forms start in the corner, even in real life!
Step 11: 2nd end stud
Same process at on the other end….
Step 12: 2nd panel
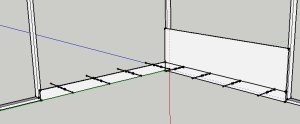
This panel should follow the pattern of the ribbon board below it. In other words, the panel extends past the inside corner so that it is nailed to the outside of the corner stud. This is what gives us the “strong” wall connection. It is really easy at this point to nail the panel to the stud as you plumb the stud – we can “steer” the stud so that it is perfectly plumb, something I look for in evaluation. The plywood must not extend past the corner of the stud as it will interfere with the function of the walers later. Remember the thickness of the finger rule – not more than 1/2″ back from the corner of the stud.
Step 13: remaining studs
Now is the time to place the rest of the studs. “Rules” to follow: -at least 2 nails per stud, studs to be reasonably plumb, placed at a maximum of 19-3/16th’s O.C. spacing.
If you have finished this step with all of the instructions correctly followed and properly executed, the rest of the exterior wall is a gimmee. Just continue to follow the patterns you have created.
More to come on this project,
J


Beautiful illustrations and explanations.
Aren’t there more steps to the process than just this ?
Yep! You have to read all the posts between the 14th to the 18th inclusive!!! Dig deep!
j